Defining your site
Before ordering your report you will need to define your site on the map provided. To do this use the shape, autofill, line or point tools provided in the Define Site box in the top left-hand corner of the screen (see below):
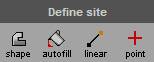
To turn a tool on or off, click the button for the tool you want. The tools will appear indented when they are turned on and pop out again when you turn them off. Decide which of the tools is most appropriate to use to define you site and follow the instructions provided in this section.
If you have a particularly large site it is advisable to initially define the site on one of the smaller scale maps such as road atlas. Please note, the autofill tool will not work unless the mapping is sufficiently zoomed in to register as being on the detail layer. The different scales of mapping can be accessed by using the slider provided in the top right-hand corner of the screen:

To zoom in either use the  button, or use your mouse to drag the slider
  to the right.
To zoom out either use the  button, or use your mouse to drag the slider to the left.
If you have a scroll wheel on your mouse, you can also left-click on the map and then use this wheel to zoom in or out.
Once you have defined the site on this layer you can zoom in to alter or adjust the site area specified on a more detailed layer. This allows you to define the site more accurately.
Next: Defining your site using the shape tool
or
Next: Defining your site using the autofill tool
or
Next: Defining your site using the line tool
or
Next: Defining your site using the point tool


 Call our Technical Support on 0844 844 9961