Defining your site using the line tool
The line tool enables you to measure between two or several points on the map or draw a line. It is ideal for following a feature such as a pipeline or road.
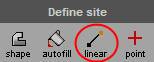
| 1. | Click the linear tool on the Define site panel. |
| 2. | Position the mouse cursor at the exact position on the map where you want to start drawing the line. Click once with the left mouse button. |
| 3. | Move the mouse cursor to the next point and click the left mouse button once more. You will notice that as you move the mouse cursor, a red line is drawn between the current mouse location and the previous point. |
| 4. | Repeat step 3 for each point of the line until the whole line has been drawn. To finish drawing the line either double left-click your mouse as you are defining the last point or click the linear tool button again. |
| 5. | You will now see an alert that asks you to choose your Linear Site Width: |

Click the OK button.
| 6. | The Linear Site Width defaults to 15m. If you wish to change it, select the desired width from the drop-down box on the left-hand side of the screen: |
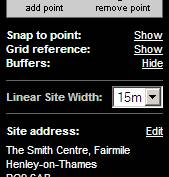
| 7. | Once you have defined you site, a buffer will automatically appear on the map around your site based upon the linear site width chosen. Additional buffers may be displayed and wont be printed in your reports. For more information on buffers please refer to Buffers. |
Tips
Dealing with numerous points
Switch on Snap to point. For help with doing this please see Snap to point. By holding down the space bar, the points in-between the two that you click will be picked up automatically. The line snaps to the nearest map feature or digital data point automatically. However, if there is an orange point in-between, you will not be able to snap to the line, as there is a change in the map feature. In this case you must click to the nearest orange point and click from the orange point to wherever you want the end of the line to be.
|
Navigating while using a tool
Use the arrows provided on the frame surrounding the map to move around the map while using the tools.
|
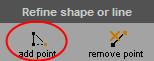
Adding points
Click the add point button on the Refine shape or line panel:
Now when you move the cursor over the map, you will notice that it has changed shape:  The point of the cursor tells Envirocheck where to add the new point. Place the cursor on to the map where you would like to add the point and left-click once with your mouse. The new point will appear on the map. The point of the cursor tells Envirocheck where to add the new point. Place the cursor on to the map where you would like to add the point and left-click once with your mouse. The new point will appear on the map.
|
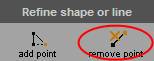
Removing points
Click the remove point button on the Refine shape or line panel:
Now when you move the cursor over the map, you will notice that it has changed shape:  The position of the cursor tells Envirocheck where to remove the point. Place the cursor over the point you have defined and wish to remove and left-click once with your mouse. The point will be removed from the map. You can use this tool to remove points that were already on the map and ones that you have added. It will have no effect if not used on a point. The position of the cursor tells Envirocheck where to remove the point. Place the cursor over the point you have defined and wish to remove and left-click once with your mouse. The point will be removed from the map. You can use this tool to remove points that were already on the map and ones that you have added. It will have no effect if not used on a point.
|
Correcting mistakes
At any point while drawing your line you can press the backspace button on your keyboard to erase the most recently drawn line segment. You can use the backspace key to erase multiple line segments if you wish by pressing it repeatedly.
You are also able to move or delete the entire shape once it is complete.
To move the line, select it by left-clicking it, then use your mouse to drag to the appropriate position on the map.
To delete the line, click the line tool button again. This will bring up the following warning:
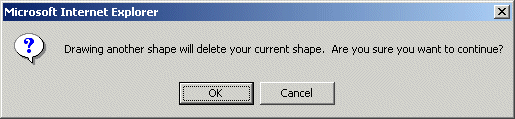
Click the OK button, the previous line will be deleted, and the line tool is active and ready for you to use.
Alternatively, you can select the completed line by left-clicking it, then press the Delete key on your keyboard.
|
Next: Defining your site using the point tool


 Call our Technical Support on 0844 844 9961