Adding a Polygon Pin
Envirocheck Analysis provides the facility to mark and identify polygon features on the map for your analysis.
 Adding a Polygon Pin
| 1. | To add a pin to mark a polygon feature on the map click on the Put new polygon-pin on map button  , located in Enviropad in the bottom left-hand corner of the screen. , located in Enviropad in the bottom left-hand corner of the screen. |
| 2. | Move your cursor onto the map and you will notice it has changed to an arrow with a polygon symbol  . . |
| 3. | Move the cursor to the point on the map where you want to start drawing (a corner of the feature is usually recommended). |
| 4. | Click once with the left mouse button. |
| 5. | Move the cursor to the next corner of the feature and left-click. You will notice that as you move the mouse cursor, a red line is drawn between the current mouse location and the previous point. |
| 6. | Repeat step 5 for each corner of the feature until the whole of the shape has been drawn except for the last line. The last segment (the line which makes a shape a closed shape) can be drawn by clicking on the first point of the shape or by double left-clicking your mouse. |
Tip:
| • | If you make a mistake whilst outlining a feature, use the Delete button on your keyboard to undo your last click. |
| • | Once the feature is outlined, it can be modified by holding down the Shift button on your keyboard and moving the mouse near to the outline of the feature. When the cursor is green  you can left-click on the edge of the outline to add a point. When the cursor is red you can left-click on the edge of the outline to add a point. When the cursor is red  you can left-click on an existing point on the edge of the outline to delete it. you can left-click on an existing point on the edge of the outline to delete it. |
Any points around the edge of the outline can be moved to a new location. Move the mouse cursor over the point that you want to drag, the cursor will change to a hand  , hold down the left mouse button and drag the point to its new position.. , hold down the left mouse button and drag the point to its new position..
|
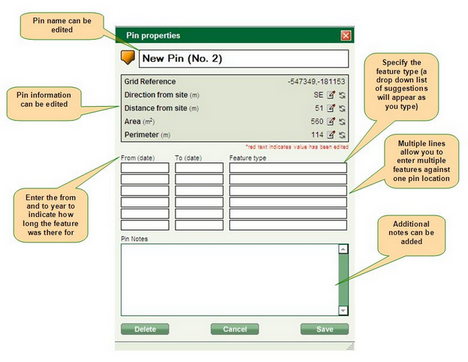
| 7. | Once you have outlined the feature, the Pin Properties window displays: |


| 8. | The Pin information includes: Direction from site, Distance from site, Area (if applicable) and Perimeter (if applicable). These are automatically supplied. Each item can be edited by clicking on the edit button  to the right of it. to the right of it. |
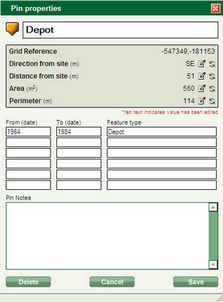
| 9. | Once the information has been edited, it will display in red to show that the original value has been modified: |

| 10. | Clicking the refresh button  will restore the original value. will restore the original value. |
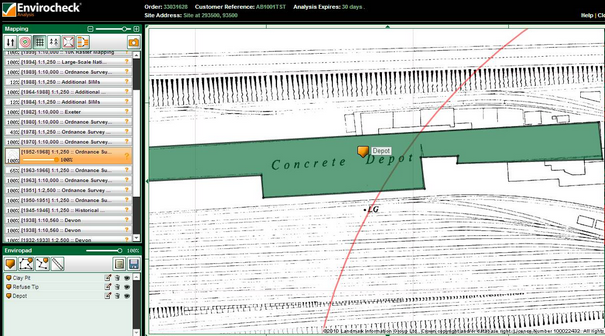
| 11. | Once all the information has been added to the pin properties window, click on the Save button. This will add a labeled pin to the map and in Enviropad in the bottom left-hand corner: |

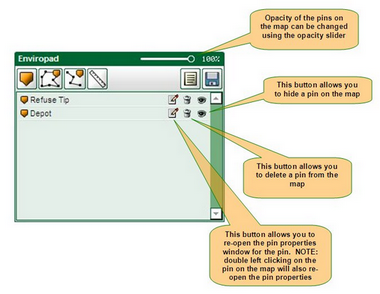
| 12. | Tools in Enviropad allow you to specify the transparency of the pins on the map, edit the pin properties, delete the pin and hide the pin: |

Tip:
The pins on your map can either be edited by:
| • | Clicking on the edit button  in Enviropad in Enviropad |
| • | Double left-clicking on the pin name in Enviropad |
| • | Double left-clicking on the pin on the map |
|
Next: Adding a Linear Pin

